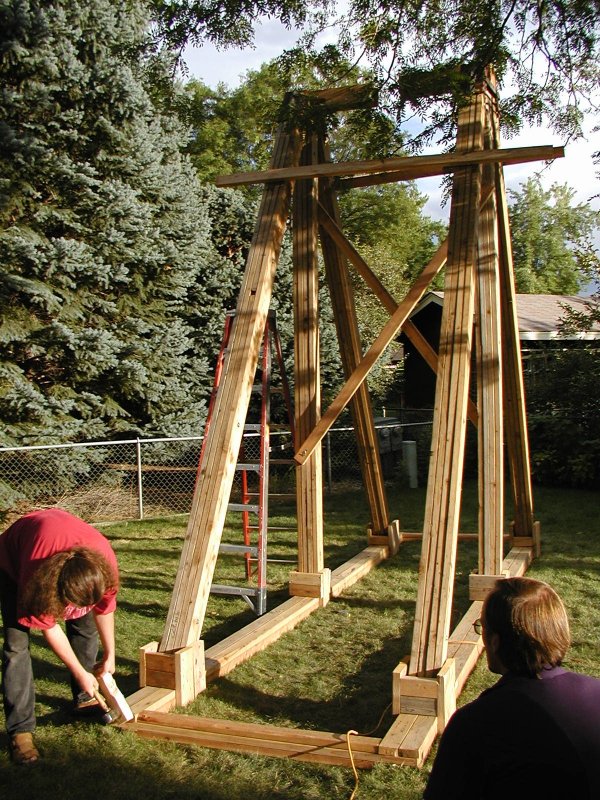
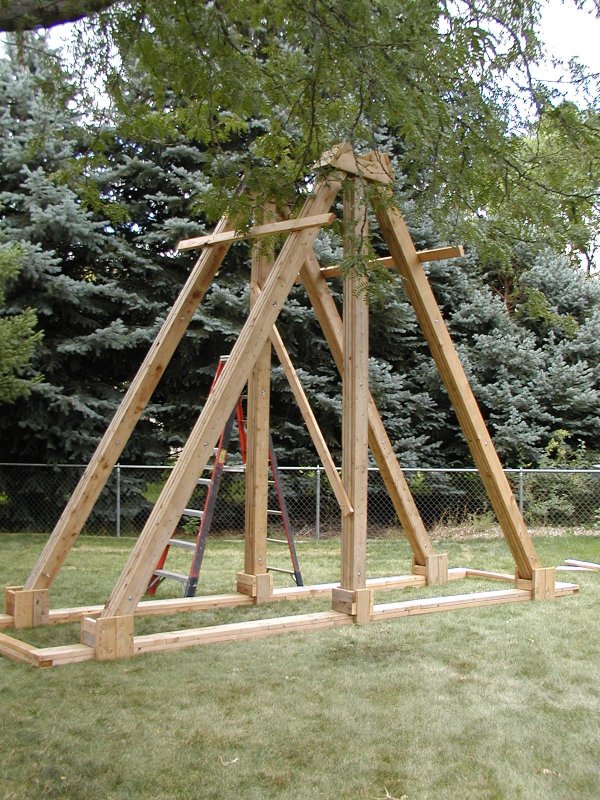
 Construction is underway. Here we have the basic frame, four 14' legs, two 12'
legs, and at the rear, the headcaps which will bind together the top of the legs
and support the axle.
Construction is underway. Here we have the basic frame, four 14' legs, two 12'
legs, and at the rear, the headcaps which will bind together the top of the legs
and support the axle.
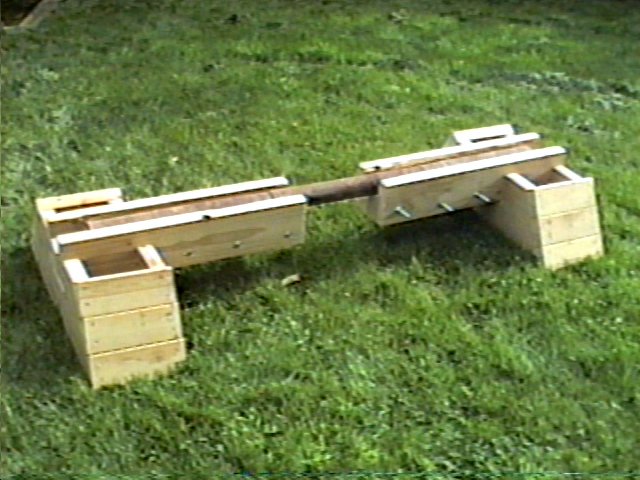 The trapezoid pieces are cut from 2x10. The boards up the sides are 9" lengths
of 2x4. Note that the axle itself is 2.5" diameter!
The trapezoid pieces are cut from 2x10. The boards up the sides are 9" lengths
of 2x4. Note that the axle itself is 2.5" diameter!
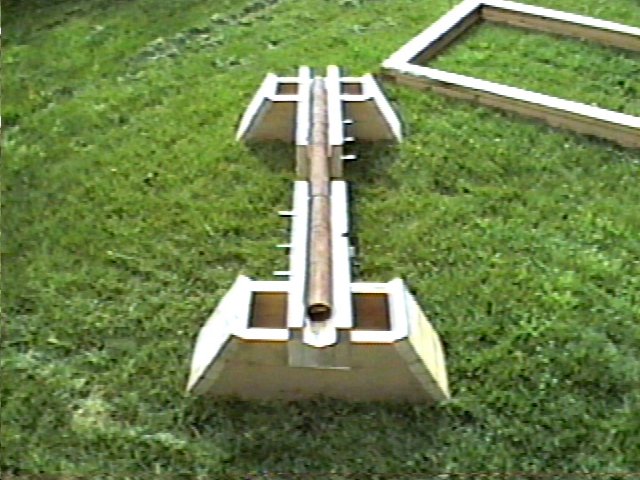 Here you can see the channel that supports the axle. We cut a 22° slope down
the side of a 2x4, cut the lengths, and turned them together to form a channel.
The sides are 2x6's.
Here you can see the channel that supports the axle. We cut a 22° slope down
the side of a 2x4, cut the lengths, and turned them together to form a channel.
The sides are 2x6's.
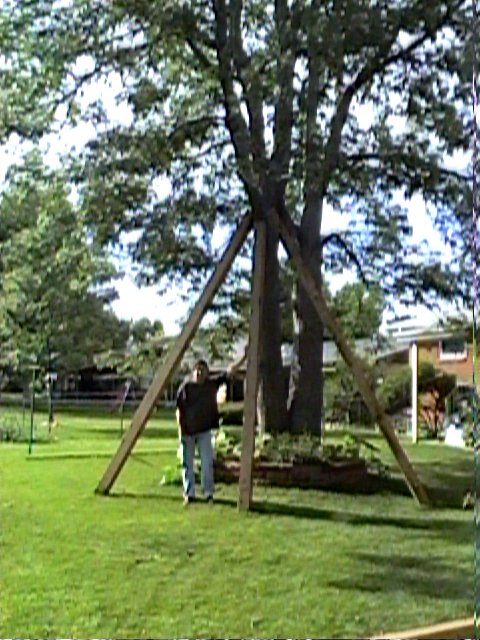 That branch is just the right height to stand up the legs against. This gives me a good
idea of the scale I'm working with.
That branch is just the right height to stand up the legs against. This gives me a good
idea of the scale I'm working with.
 The throwing arm is currently 23' in length, with a planned long-arm length of 16'.
The short-arm will probably be cut down a bit when I decide on the final ratio.
The throwing arm is currently 23' in length, with a planned long-arm length of 16'.
The short-arm will probably be cut down a bit when I decide on the final ratio.
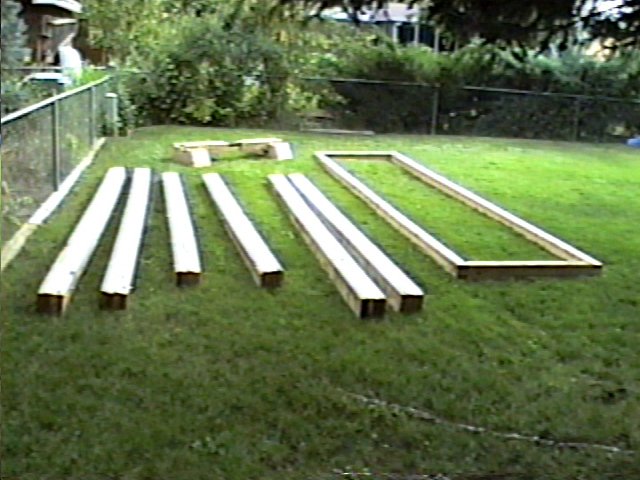
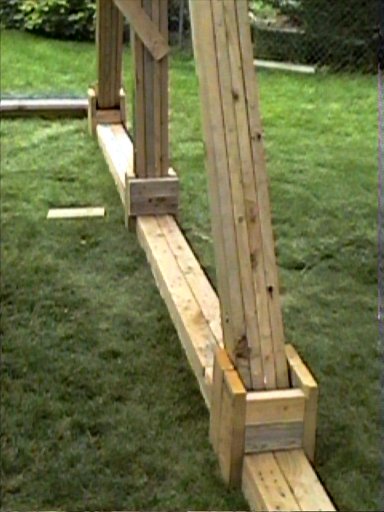
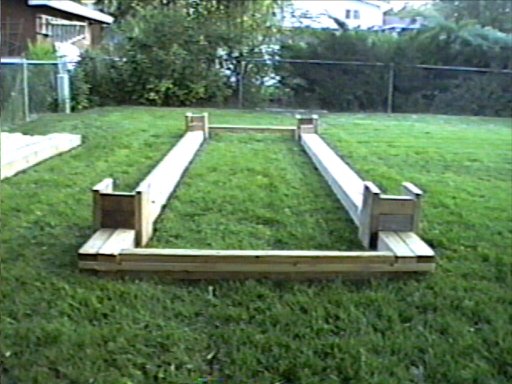 Yesterday I beefed up the base frame by doubling up the 2x4's on each side.
The end pieces were rebuilt to accommodate the new construction.
The inside width is 4', and the overall frame size is 5'2 x 18'
Yesterday I beefed up the base frame by doubling up the 2x4's on each side.
The end pieces were rebuilt to accommodate the new construction.
The inside width is 4', and the overall frame size is 5'2 x 18'
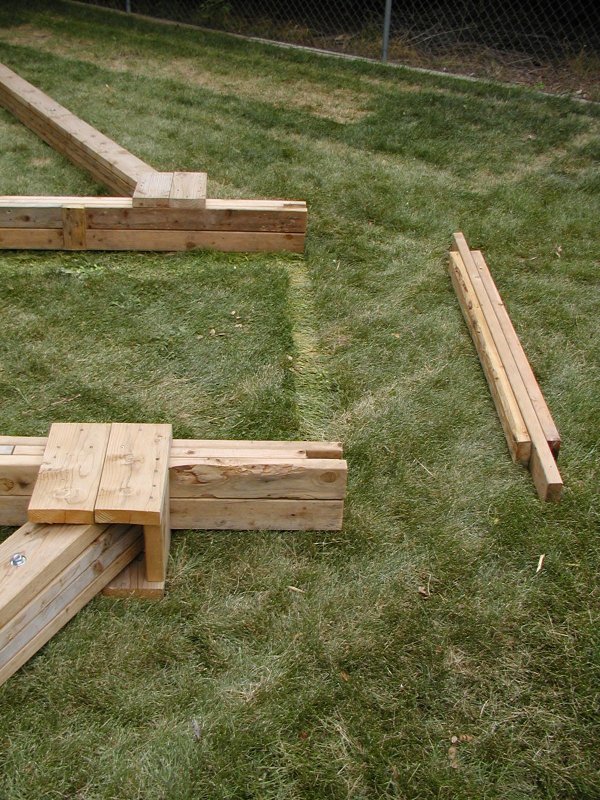
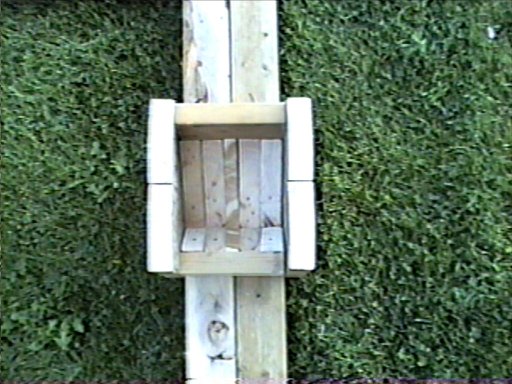
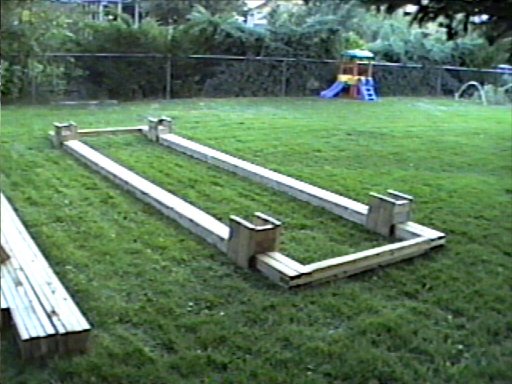 Today I worked on the leg pads. That's the 4 blocks on top of the frame.
Overall I cut 10 pieces at 30 degree angles for each pad.
Today I worked on the leg pads. That's the 4 blocks on top of the frame.
Overall I cut 10 pieces at 30 degree angles for each pad.
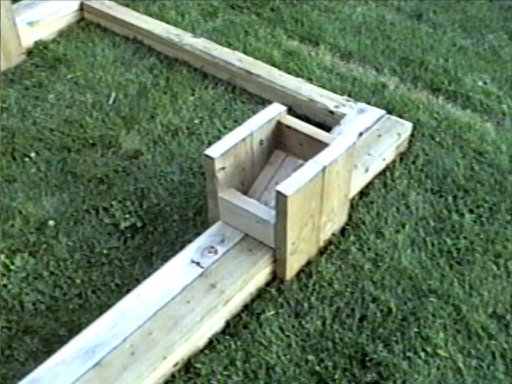 Here you can see the edge of some of those angled blocks.
Since the legs will be sitting at an angle, I had to have something to prop
up the bottoms on.
Here you can see the edge of some of those angled blocks.
Since the legs will be sitting at an angle, I had to have something to prop
up the bottoms on.
 From this view you can see all the pieces that had to be nailed in place.
Each leg will drop into a pad, then a 1" pin will be driving through to hold
them to the frame.
From this view you can see all the pieces that had to be nailed in place.
Each leg will drop into a pad, then a 1" pin will be driving through to hold
them to the frame.
 Here's a closer view of the legs. You can see how the boards are bolted together.
Since they will be supporting nearly a ton of counterweight, they must be strong!
Here's a closer view of the legs. You can see how the boards are bolted together.
Since they will be supporting nearly a ton of counterweight, they must be strong!
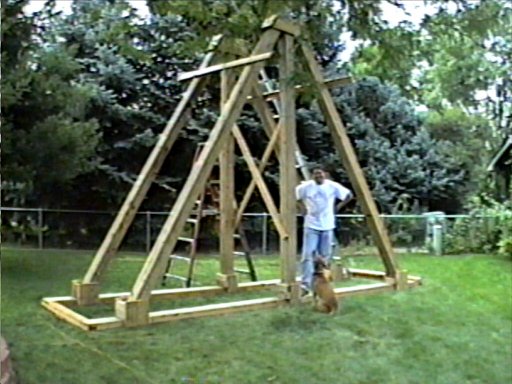 First fitting of the framework. Everything set into place as planned.
 Details of the legs sitting in the base frame.
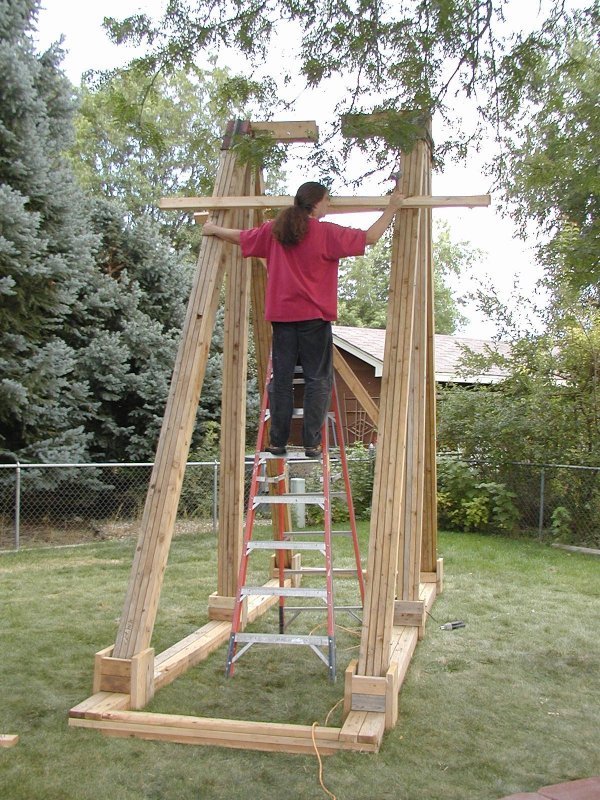
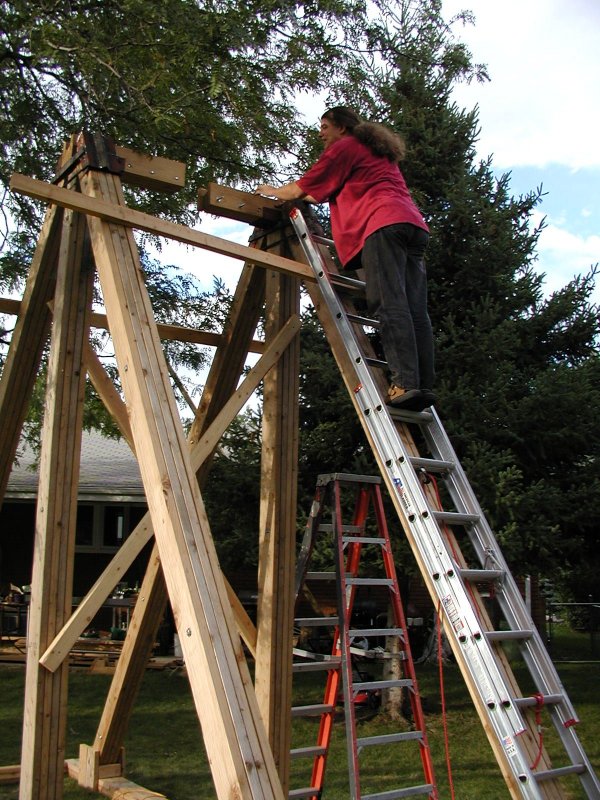
 I think I'm gonna need a bigger ladder...
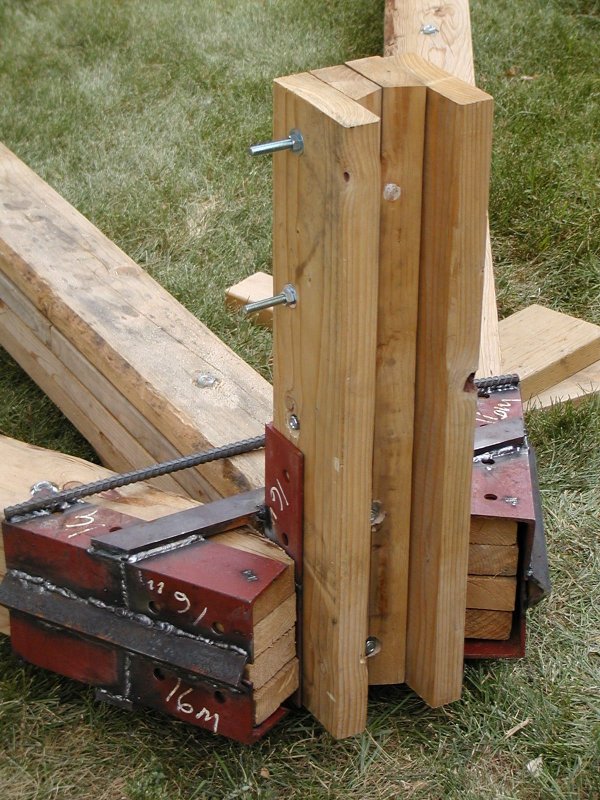
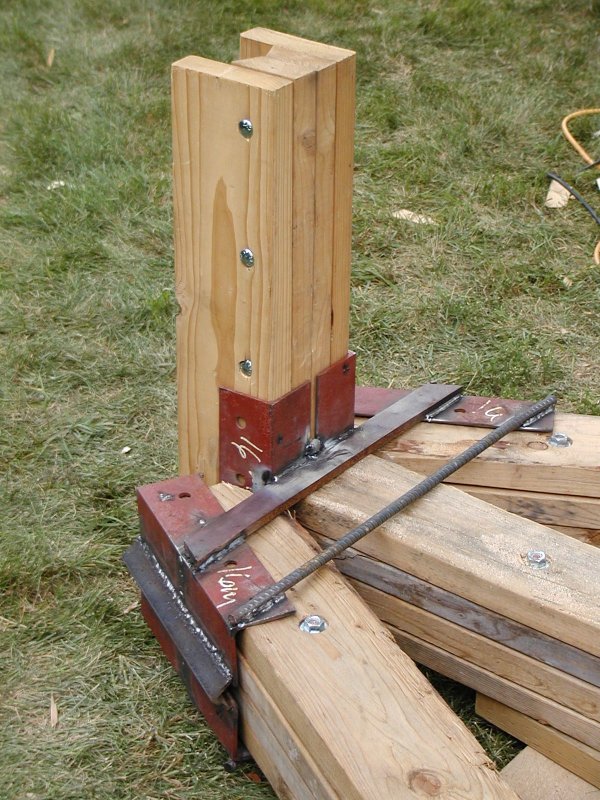
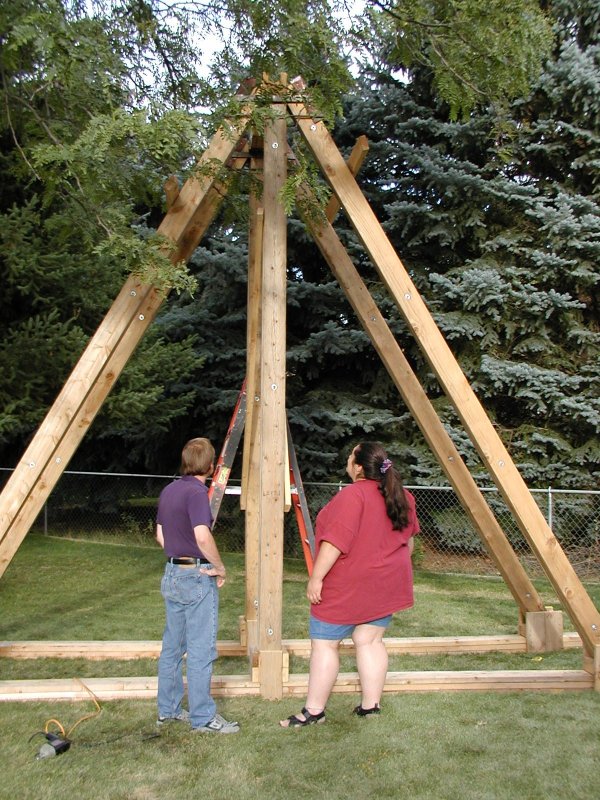
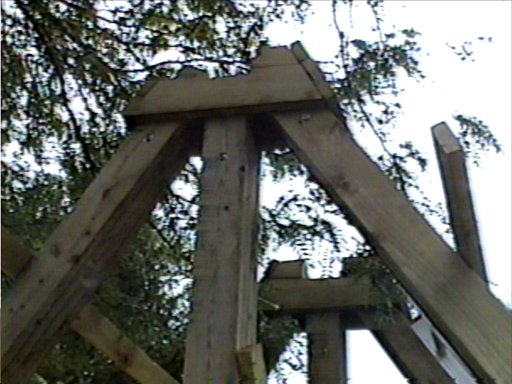 The top caps are a problem. You can see here that parts broke off during assembly,
and it's splitting at the seams.
The top caps are a problem. You can see here that parts broke off during assembly,
and it's splitting at the seams.
Here's some much better shots done with a digital camera... Thanks Bill!
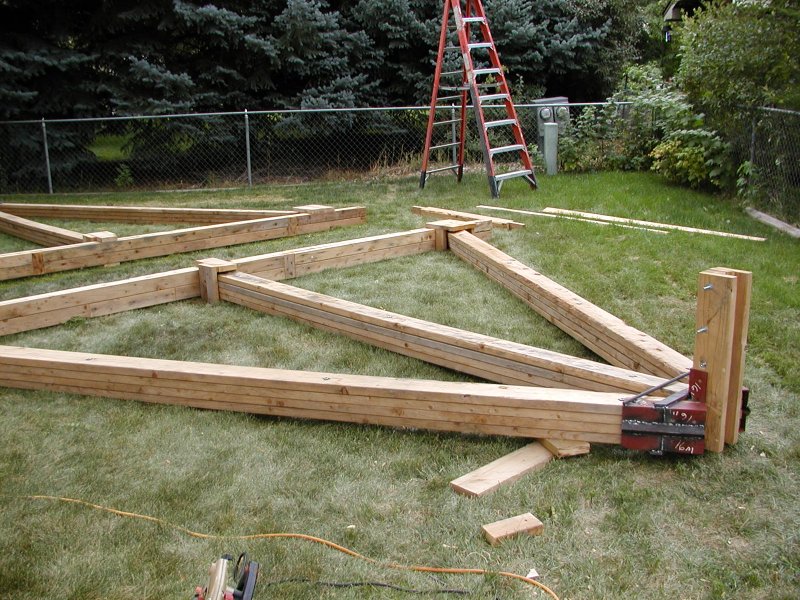 Framework laid out, ready to be raised up into place
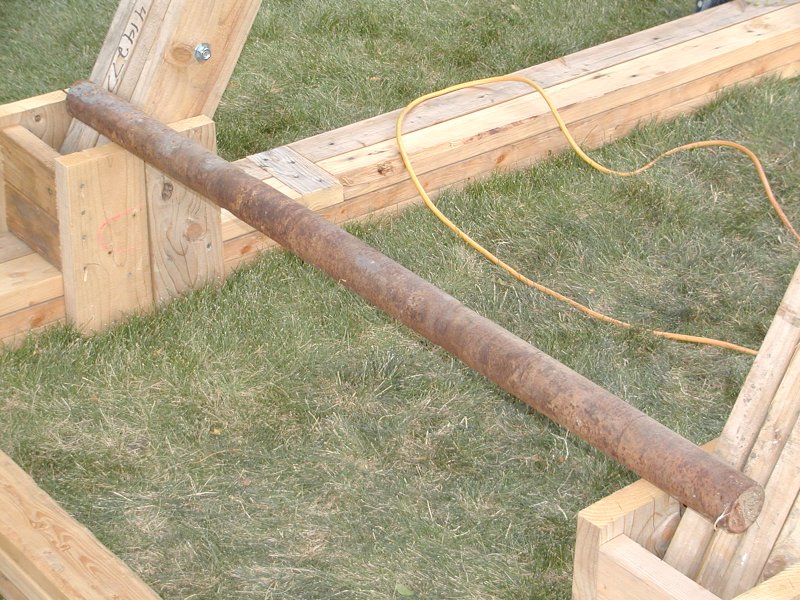 The axle, shown here for size comparison
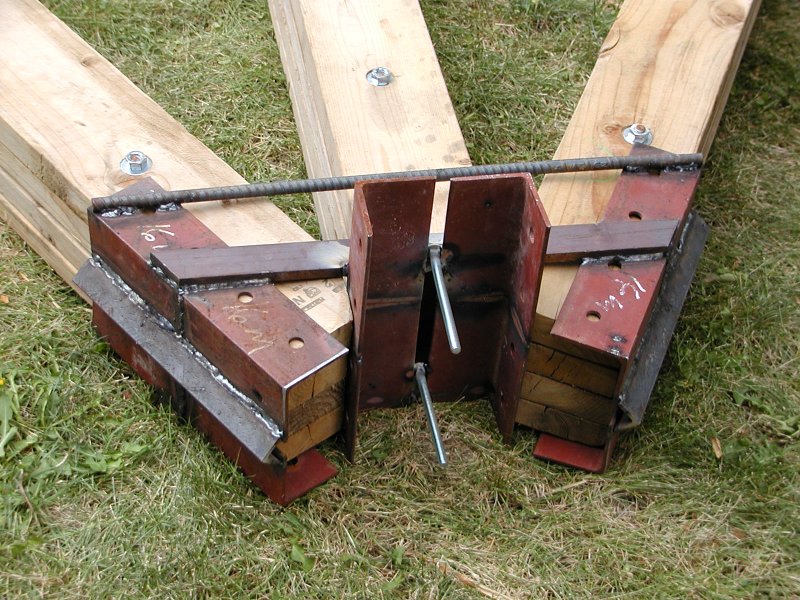 The wooden top caps couldn't take the stress,
so we welded up some new ones from scrap metal.